When your battery needs a replacement on your ValProbe RT data logger, there’s no need to send it back to replace it. We’ve designed our loggers with the customer in mind, making it very easy to replace the battery in the field. Installing a new battery will not void the warranty on any ValProbe RT, as long as the battery is replaced the proper way according to the instructions below.
Kaye’s ValProbe RT and ValProbe Standard data loggers were designed with unmatched battery life in mind by using a 3.6V lithium battery. When working in extremely low temperatures, you can also install a larger, AA-sized 3.6V battery to give your ValProbe RT extended battery life. To ensure your ValProbe RTs function properly, only use batteries supplied by Kaye, (product number M3205 for ½ AA 3.6V) or (product number 200-1001 for AA 3.6V). Using other batteries that are not from Kaye may cause the loggers to void the warranty, can shorten the life of the ValProbe RT, or cause internal issues.
Each time you replace your battery, we also recommend replacing the o-ring. Battery replacement kits can be purchased from Kaye and include the new battery, o-ring, and sealant.
Product Number for ½ AA 3.6V Kit: V2568
So when the time comes to replace the battery, follow these steps to get your data logger back up and running in no time:
STEP 1 – REMOVE VALPROBE RT HOUSING
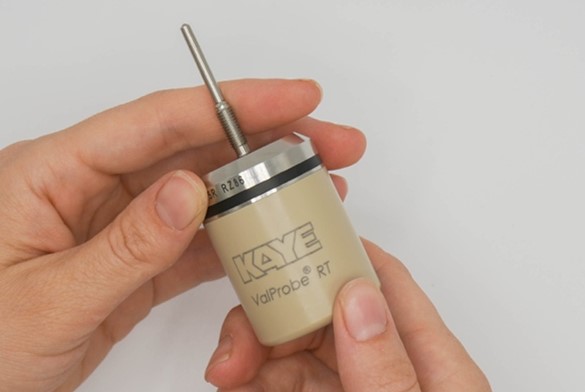
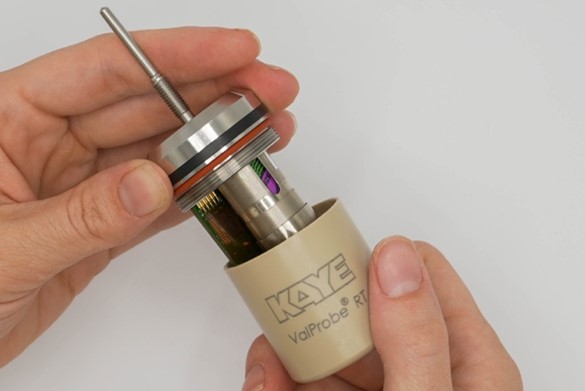
Ensure your ValProbe RT is shut off and not currently sending any data. Then, using just your hands and no tools, unscrew the housing counter clockwise until it detaches from the head of the probe. You may also use the included blue rubber grip to assist in opening.
Note: Please ensure you do not put any pressure on any other components of the ValProbe RT. Puncturing, breaking, twisting, snapping, moving, or bending of any parts, other than the battery housing and cap, can break the ValProbe RT and will void the warranty.
STEP 2 – REMOVE BATTERY CAP
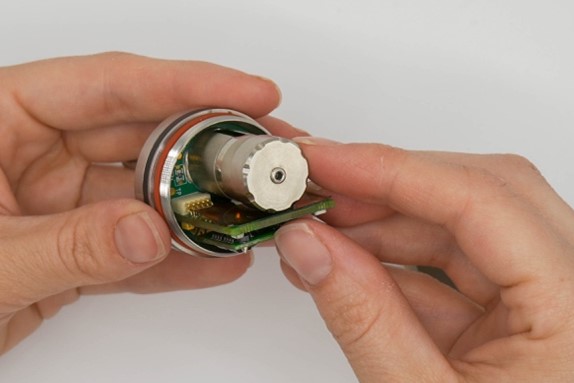
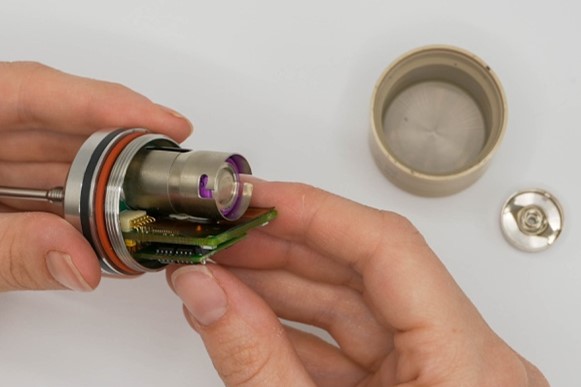
The battery cap is spring loaded. Push down and twist counterclockwise. Remove the battery cap from the battery housing.
STEP 3 – REMOVE BATTERY
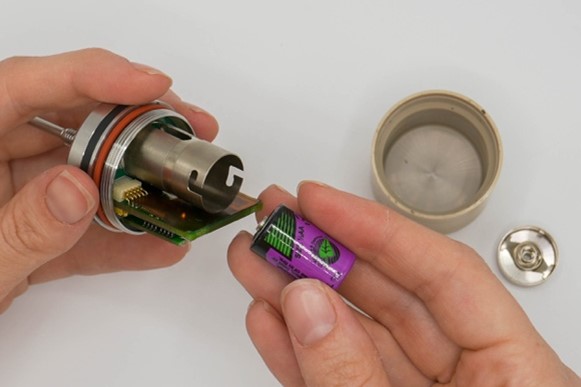
Take the 3.6V lithium thionyl chloride battery supplied by Kaye out of battery housing and set aside.
Discard the old battery according to your local environmental regulations.
STEP 4 – INSERT NEW BATTERY
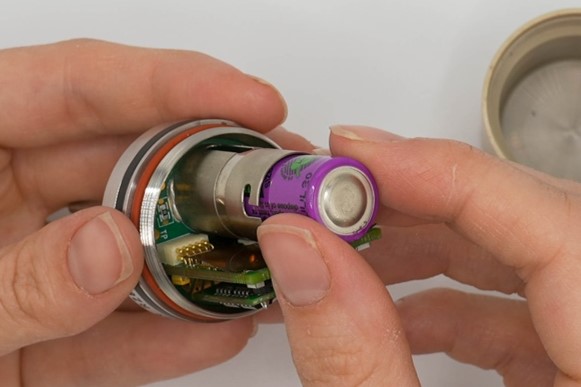
Insert a new 3.6V Kaye lithium battery (part number M3205) with the positive end facing forward.
STEP 5 – ATTACH BATTERY CAP
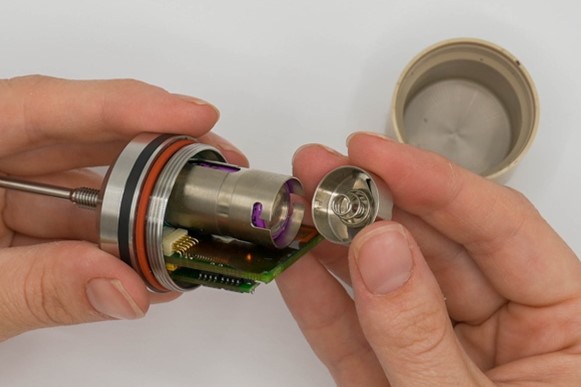
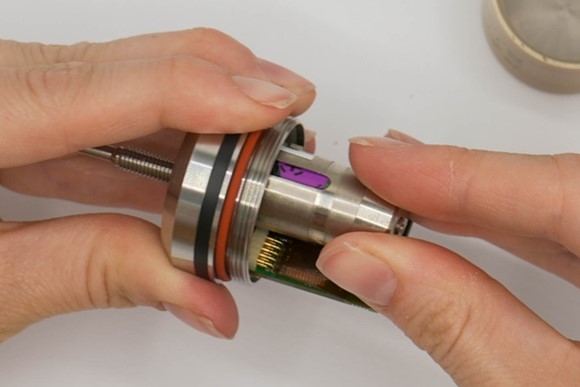
Twist the spring-loaded battery cap back on by pushing it down gently and twisting it clockwise.
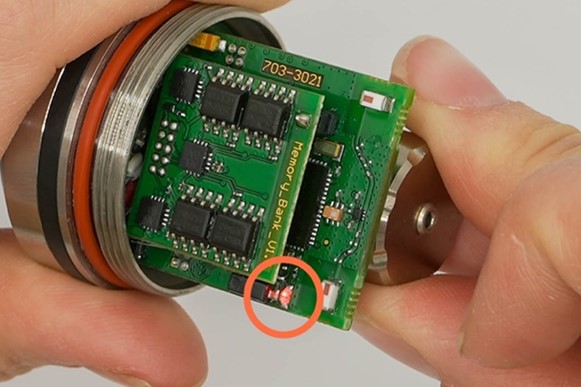
A red light should blink 3 times on the battery board, indicating that the battery was installed properly.
IF BATTERY DOESN’T BLINK
If the battery doesn’t blink 3 times, you need to wake up the ValProbe RT electronics.
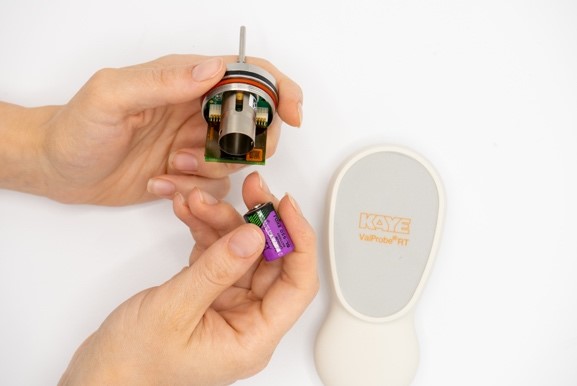
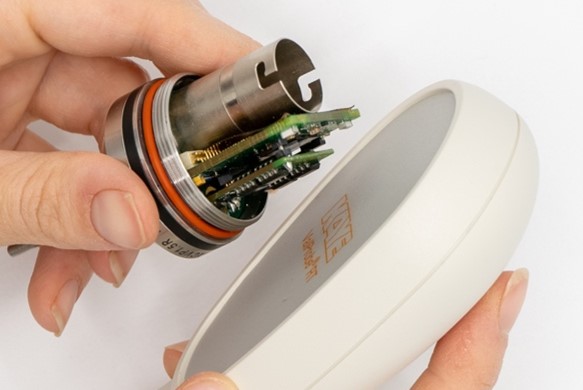
Remove the battery. Then hold the ValProbe RT electronics against the ValProbe RT Wake Up Device for 10-20 seconds. Then insert the battery and cap. The red light should now blink 3 times.
STEP 6 – REPLACE O-RING
It is recommended to replace the o-ring each time you replace the battery.
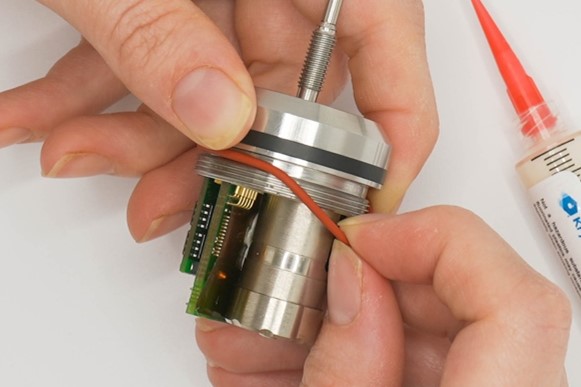
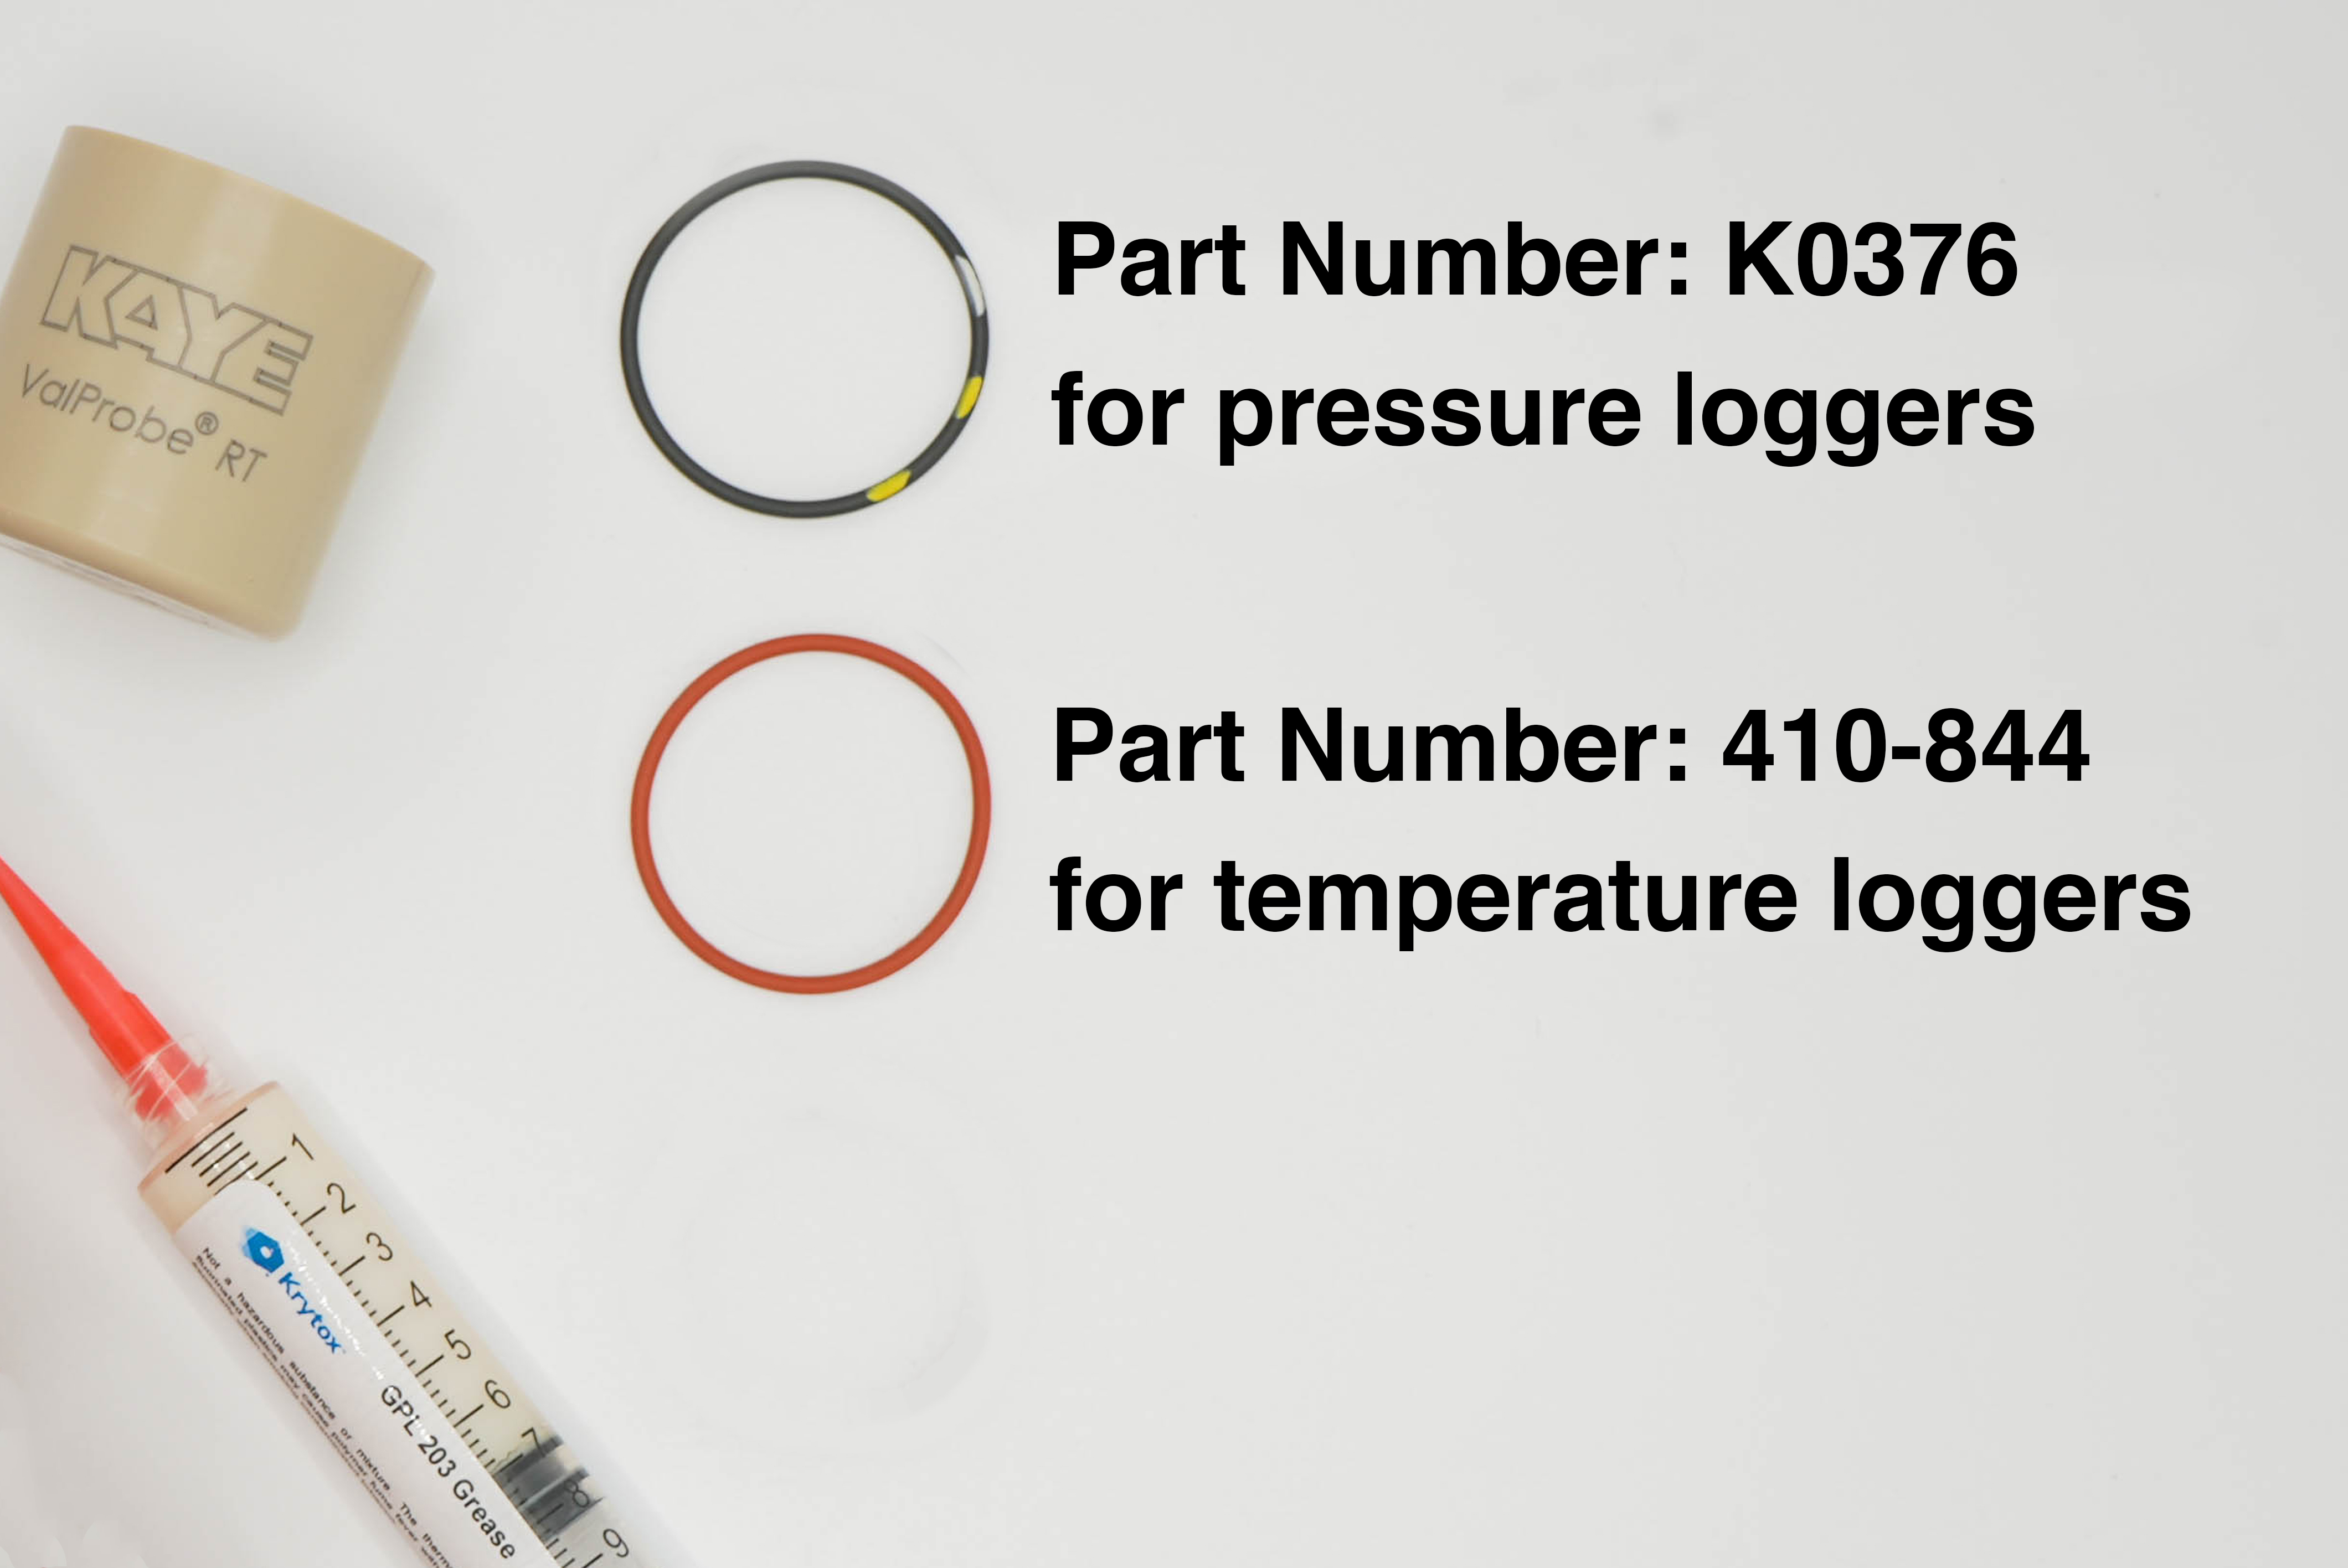
Gently remove the o-ring from the ValProbe RT. Before installing new o-ring, make sure you have the correct one. For temperature sensors, use a red o-ring and for pressure sensors, use a black o-ring.
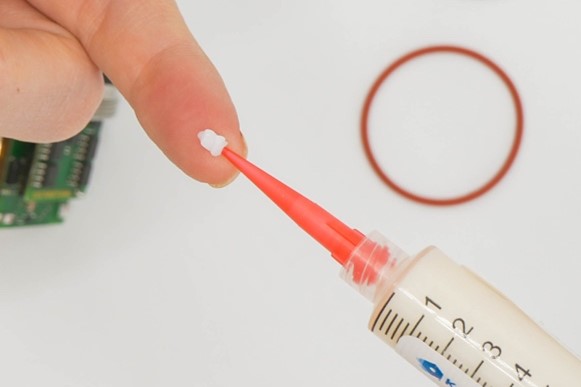
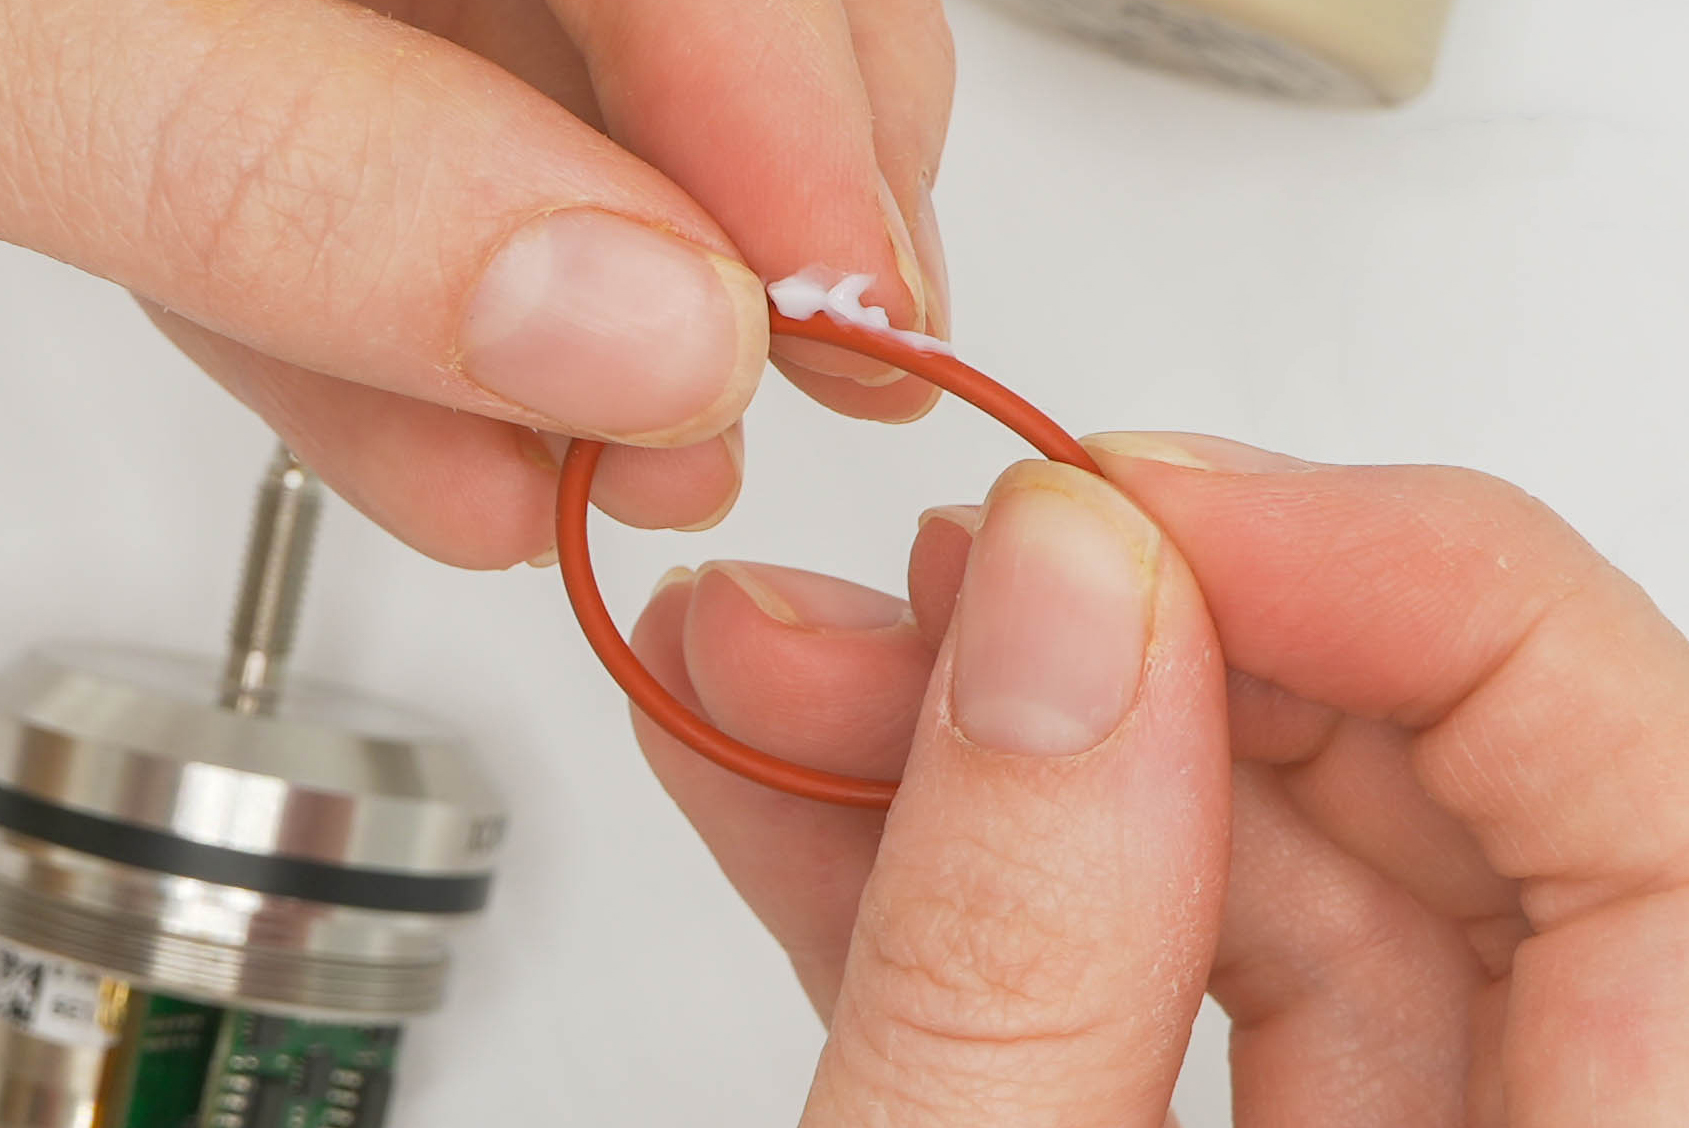
Use the Krytox sealant (part number M0681) to lubricate the new red Kaye o-ring (part number 410-844) completely. Squeeze a small amount on your finger tip and rub it around the o-ring.

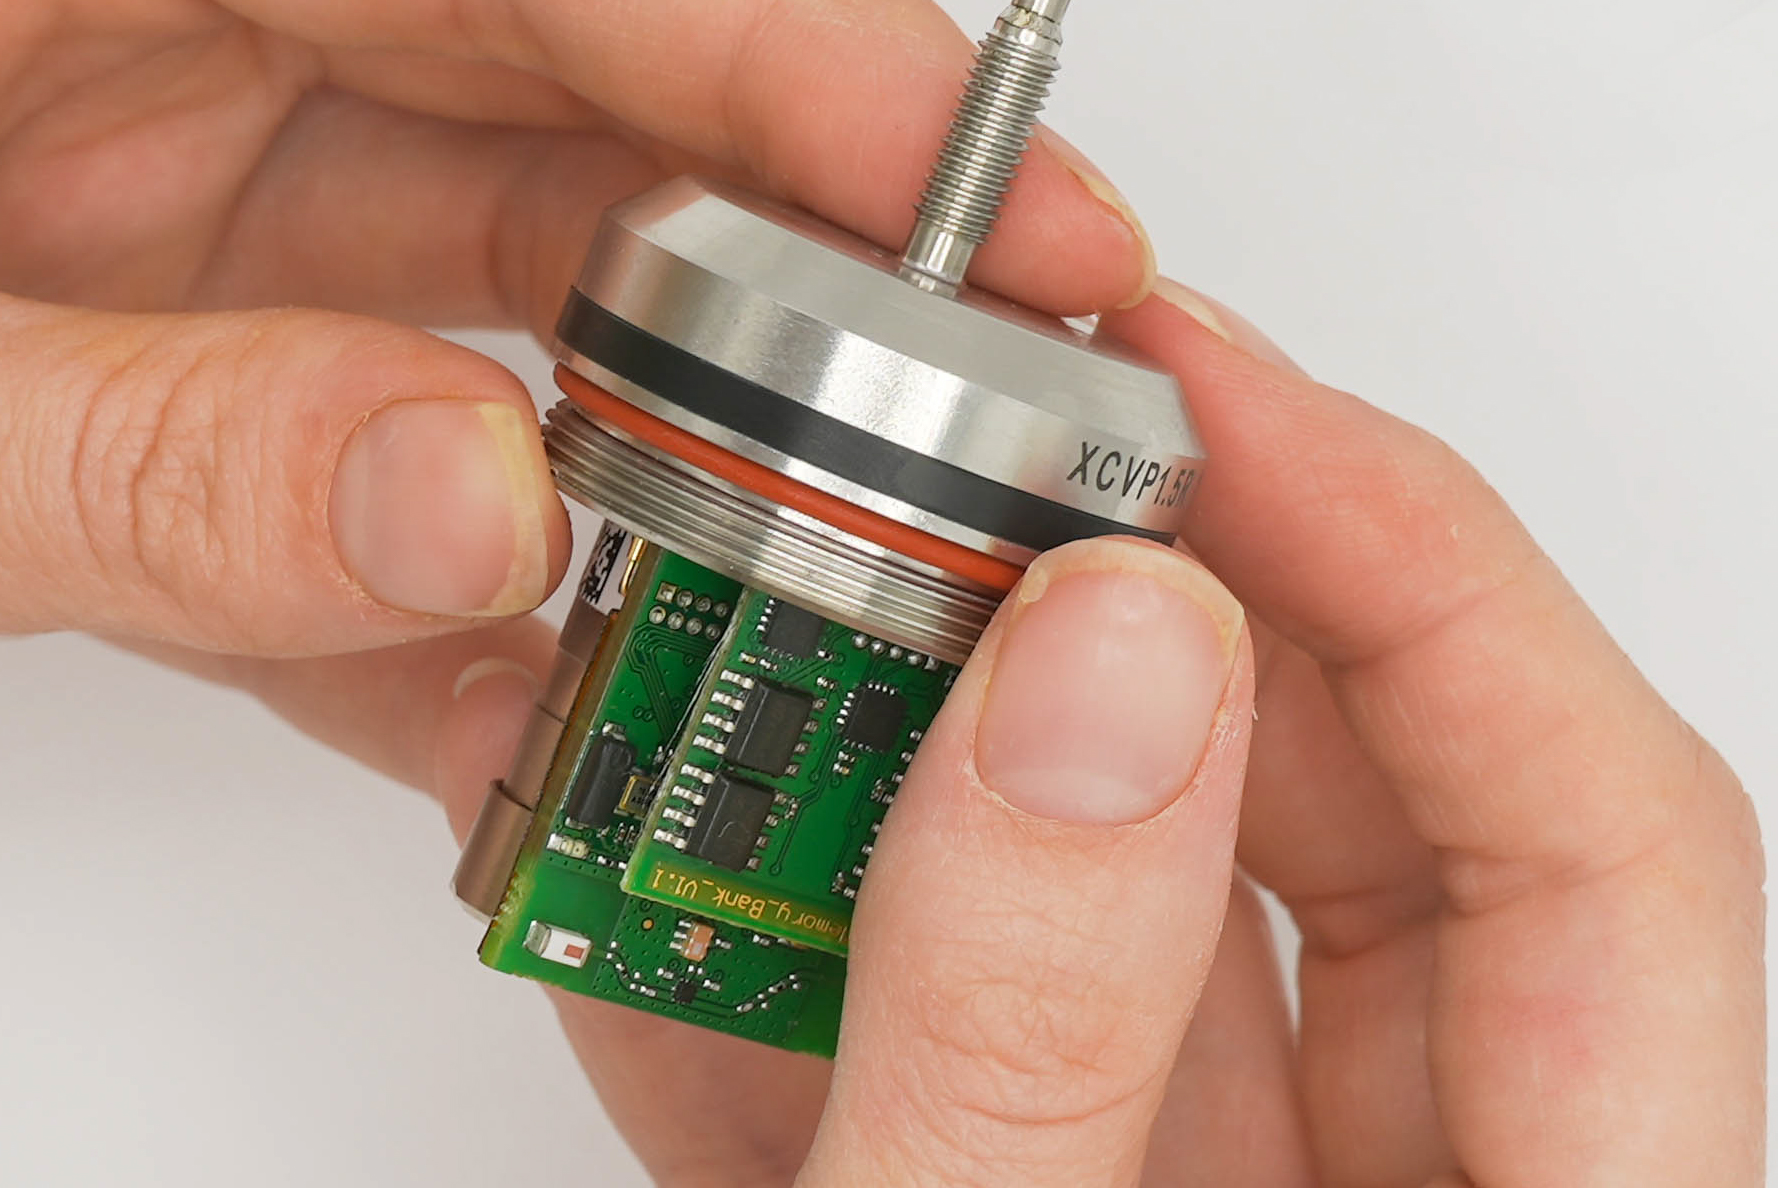
Install new o-ring onto ValProbe RT, ensuring it’s seated at the top of the threads.
STEP 7 – RE-ATTACH VALPROBE RT HOUSING
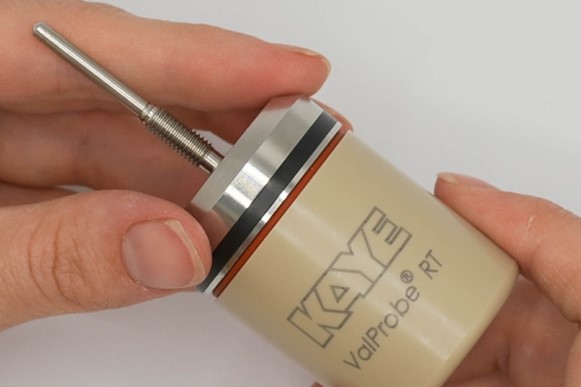
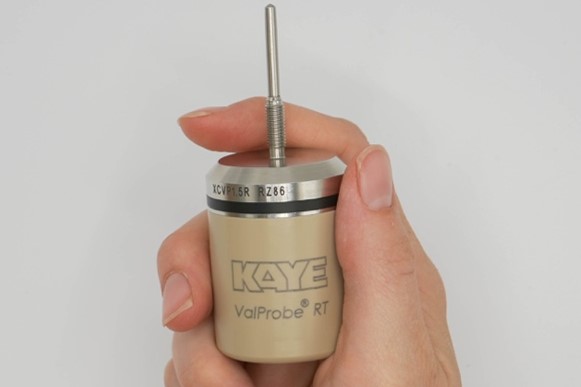
Twist the ValProbe RT housing back on until it’s snug. When the housing unit is fully attached, you should not be able to see the o-ring anymore and there should be no gap between the housing and probe.
Hand tighten only – do not use any tools and do not overtighten. It is extremely important that the ValProbe RT housing is completely and properly closed in order to prevent any leakage or damage to the electronics.
STEP 8 – RESET BATTERY STATUS IN SOFTWARE
Once you’ve replaced the battery, you must log into the ValProbe RT System software and reset the battery status, letting your software know that a new battery has been installed.
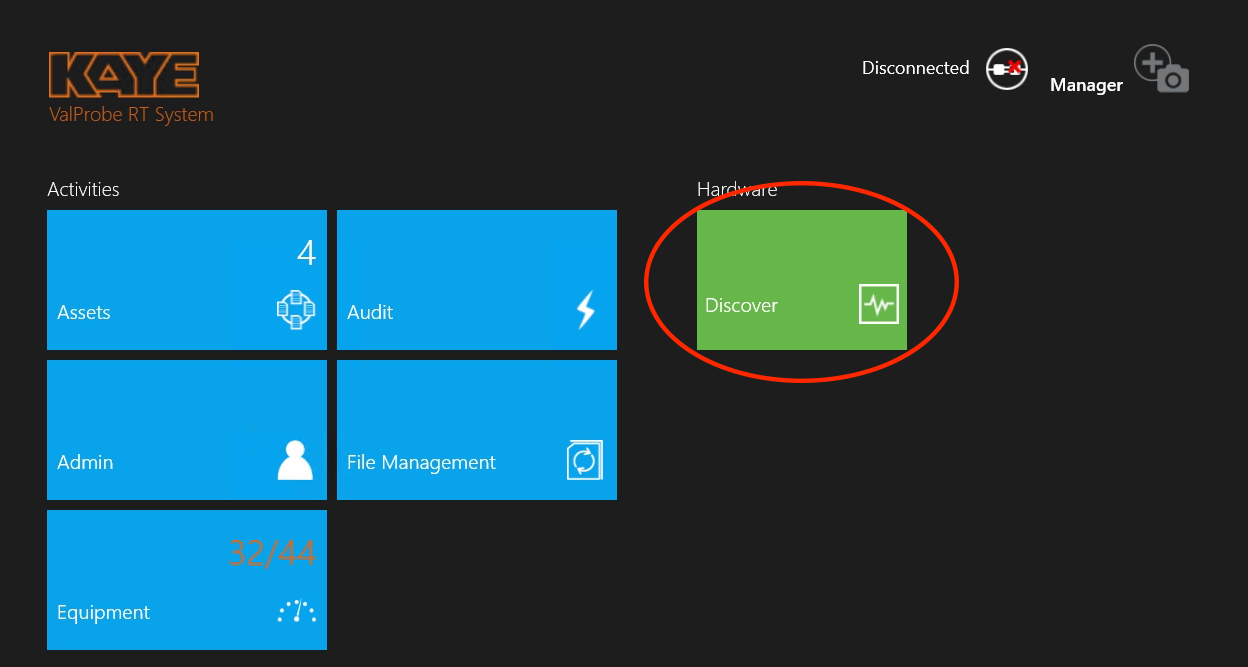
Turn on the ValProbe RT Software and wake up your logger(s). Click the green “Discover” box.

Choose the correct base station and press “Connect”
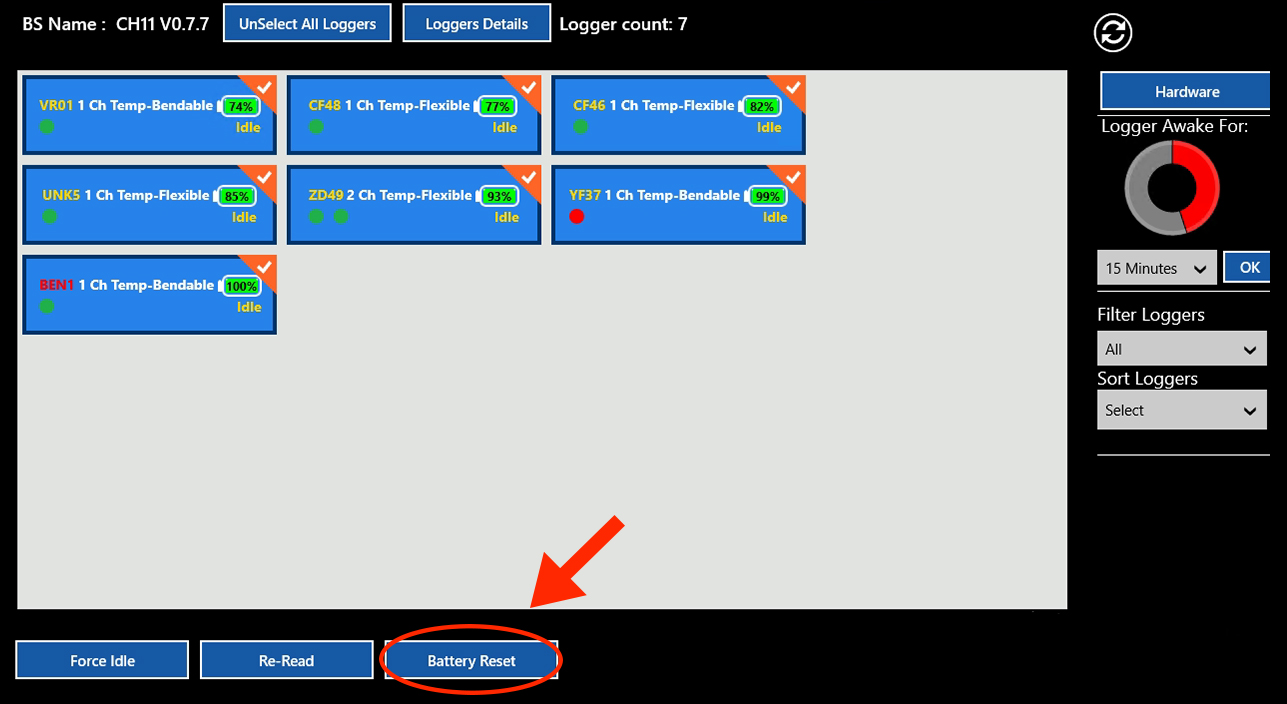
Wake up the loggers until they show up and highlight the loggers you’d like to reset and press “Battery Reset”
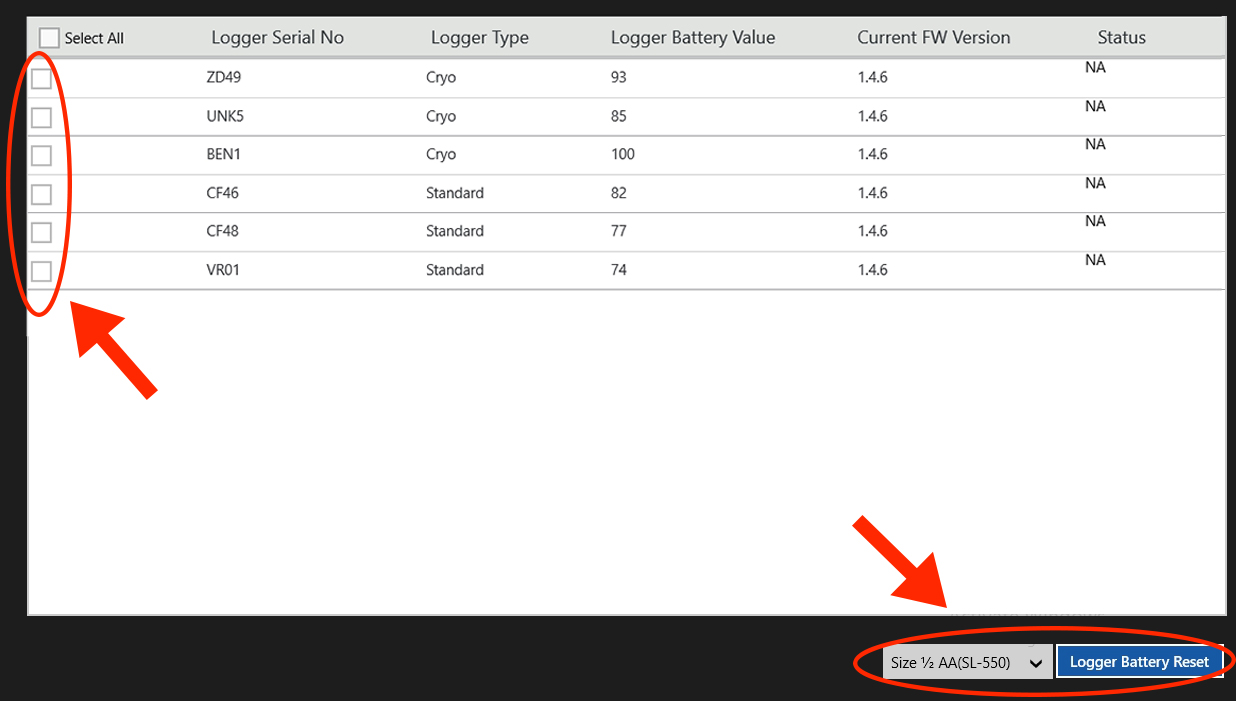
Check off the batteries you’d like to reset on the left-hand side.
Then choose the battery size. (If you installed the ½ AA batteries into some loggers and the AA into others, you must do this battery reset procedure twice, once for each sized battery).
Then press “Logger Battery Reset”
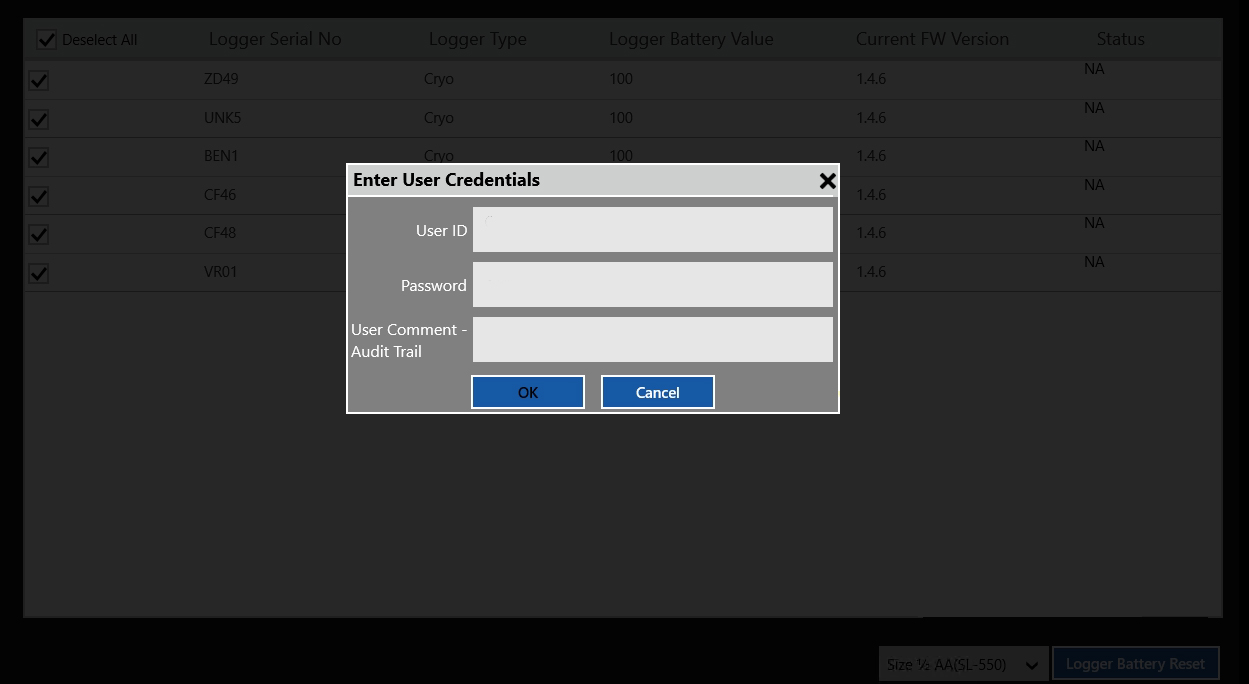
Enter your credentials for the audit trail.
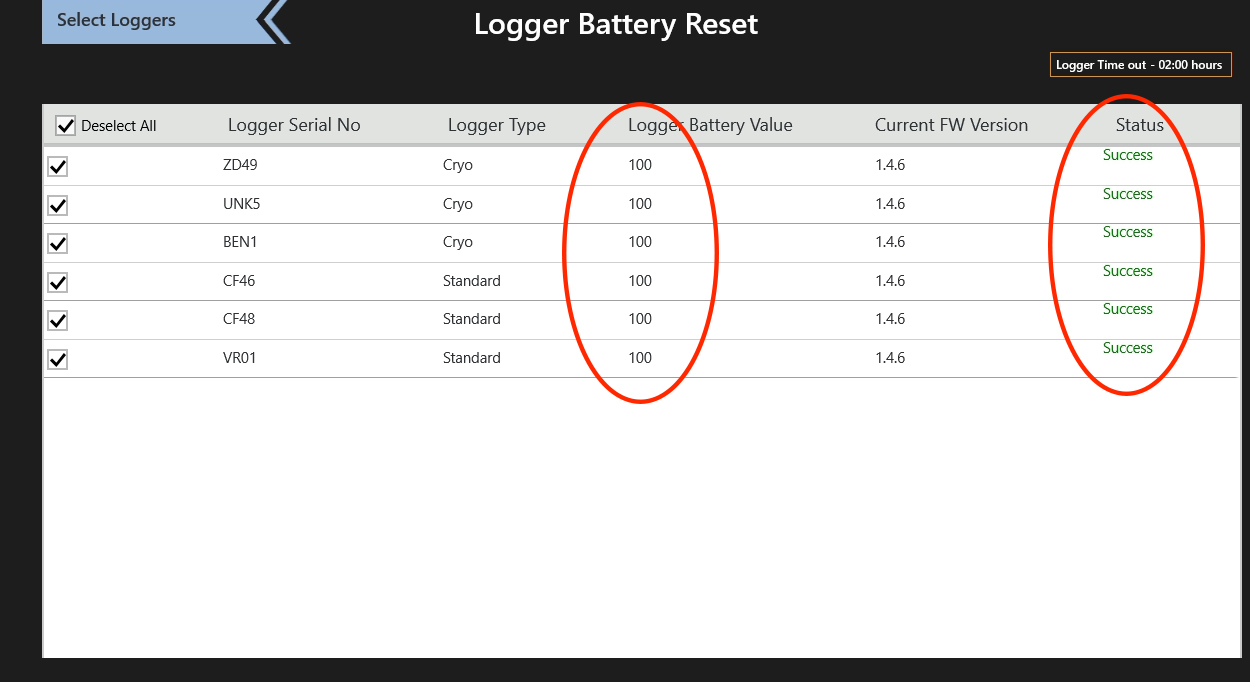
When the batteries reset, you will be taken to a report page that shows the values have been reset to 100 and the status says “Success.”
Optional Extended Battery for Extremely Low Temperatures
When performing temperature mapping at extremely low temperatures it’s recommended that you use the extended, AA-sized battery, when the application allows for enough space. You will also need the extended battery housing and extended ValProbe RT housing (part number 705-2010)
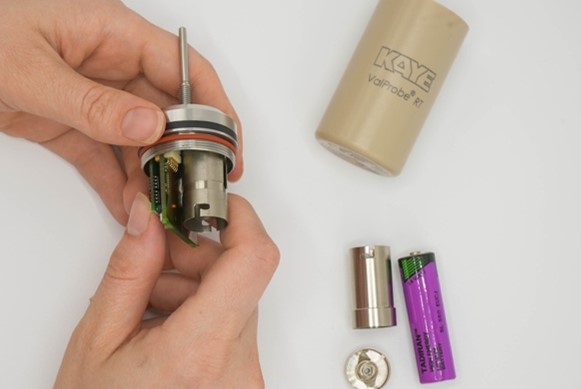
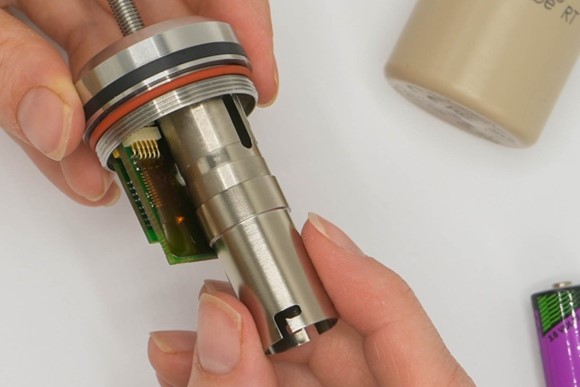
Perform steps 1-3 the same as you would for the regular battery.
Then attach the extended battery housing by lining it up on the battery housing and twisting it clockwise.

Insert a new AA 3.6V lithium battery with the positive end facing forward.
Discard the old battery according to your local environmental regulations.
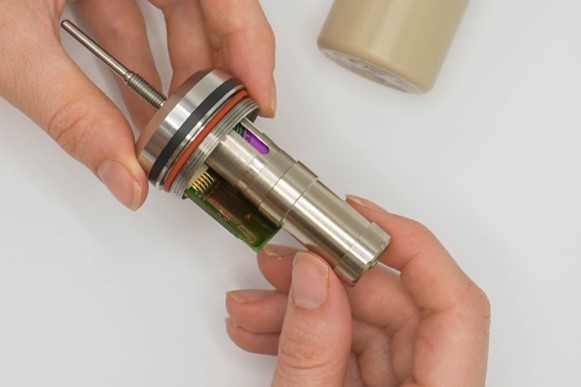
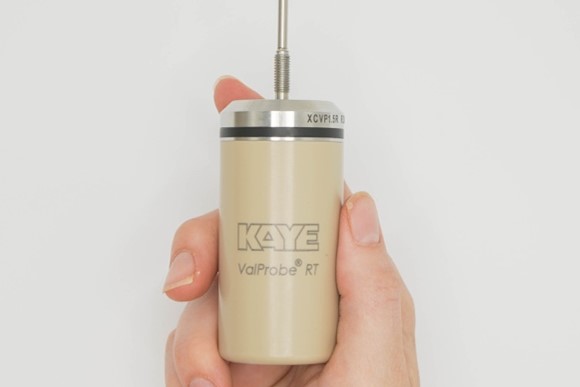
Twist the spring-loaded battery cap back on by pushing it down gently and twisting it clockwise. This will be the same cap you use for a smaller-sized battery.
When the housing unit is fully attached, you should not be able to see the o-ring anymore and there is no gap between the housing and probe.
Hand tighten only – do not use any tools and do not overtighten. It is extremely important that the ValProbe RT housing is completely and properly closed in order to prevent any leakage or damage to the electronics.


